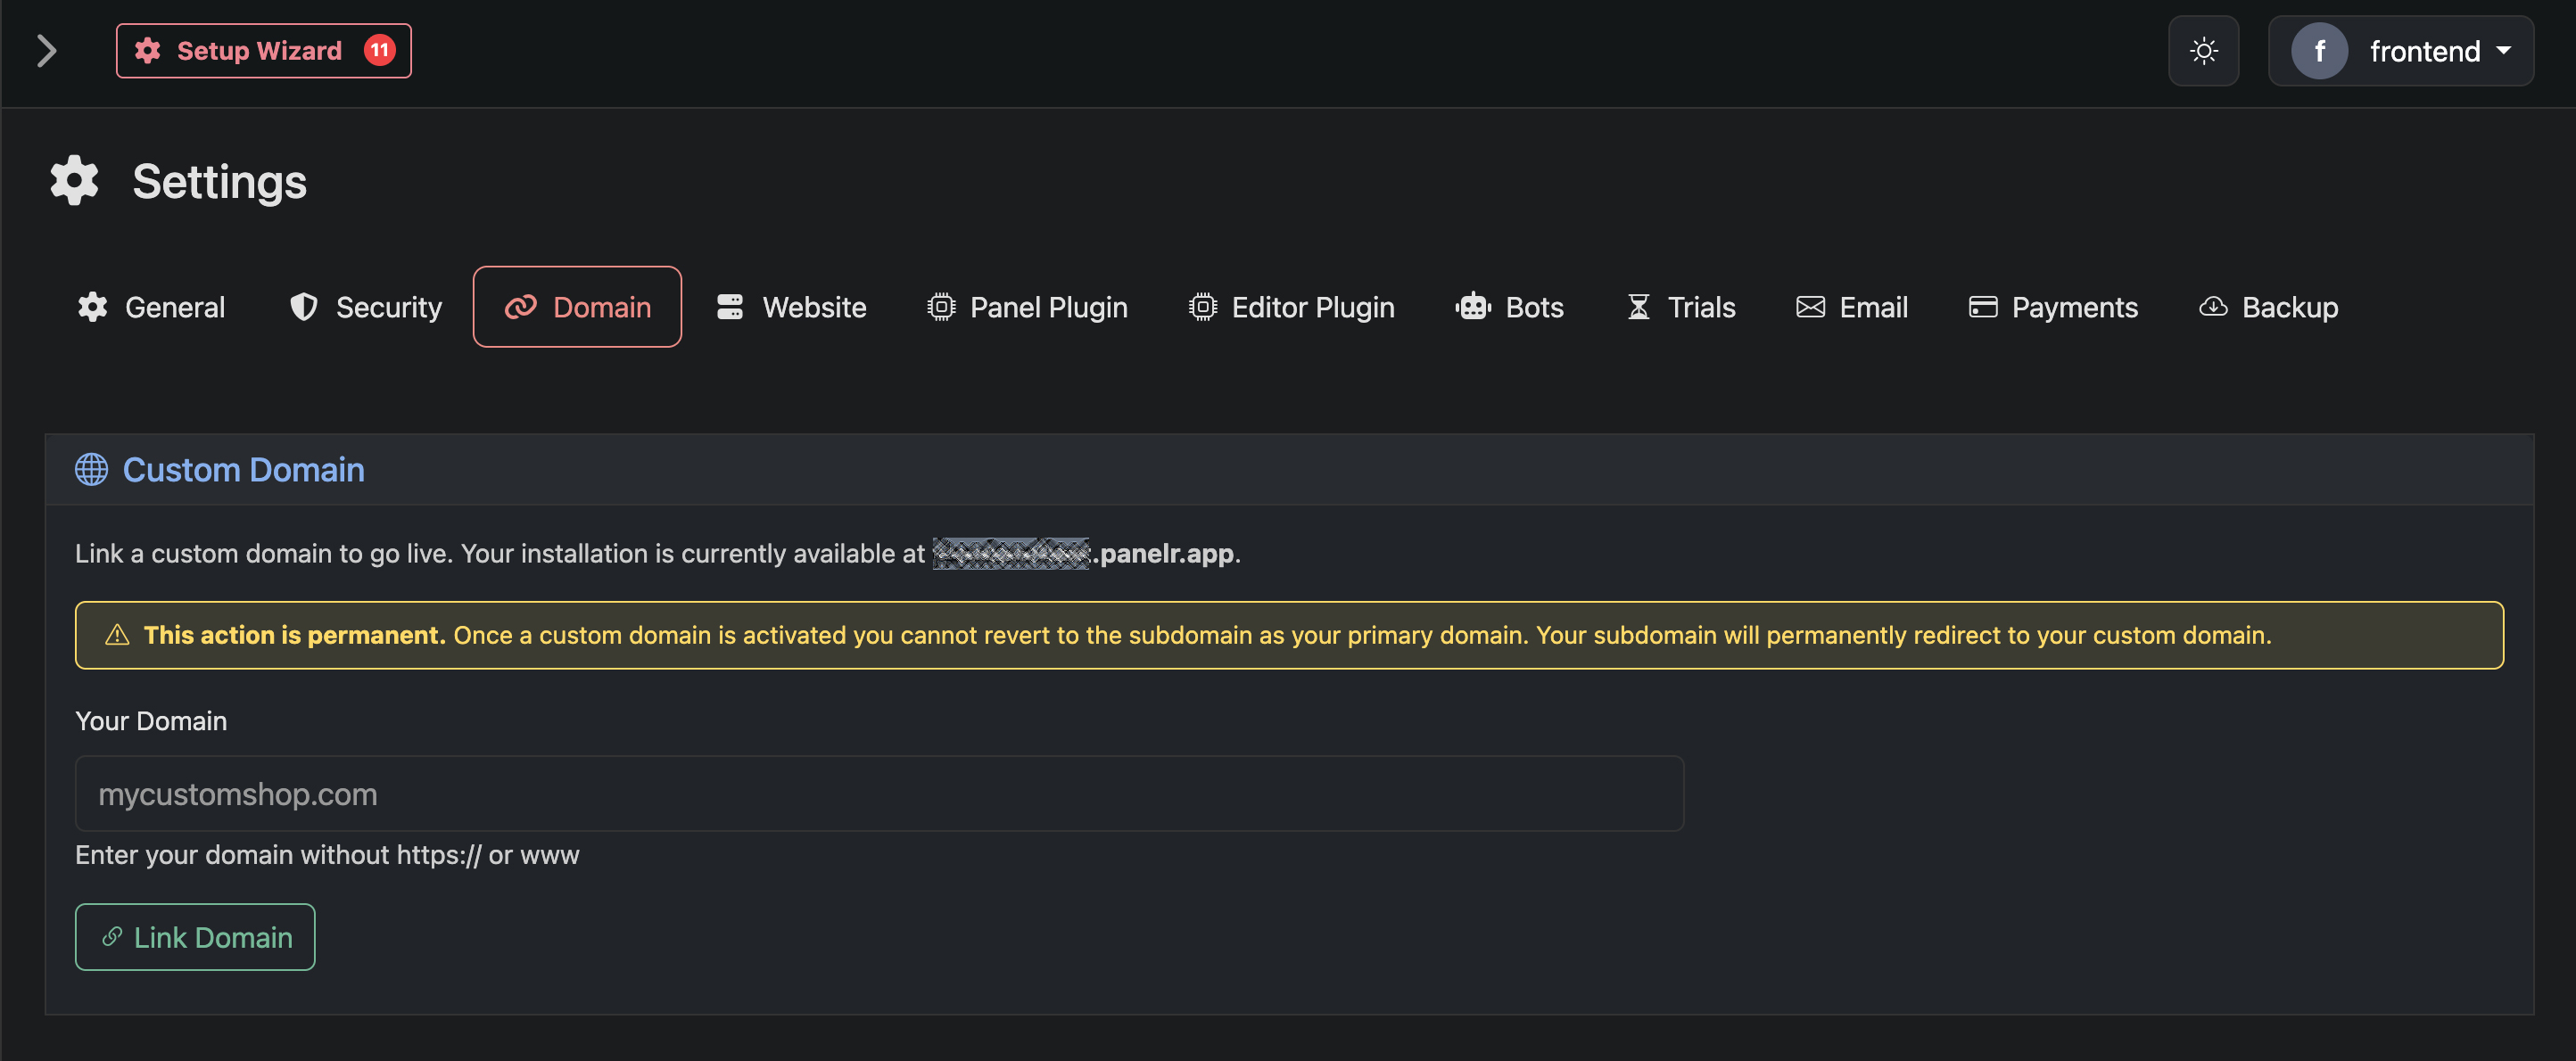
Use this page to connect your own domain to your Panelr installation. Once connected, your website, checkout, and customer experience will run entirely on your domain.
You must provide your own domain and link it to your Panelr installation.
After submitting your domain, you will be guided through a two-step verification and configuration process.
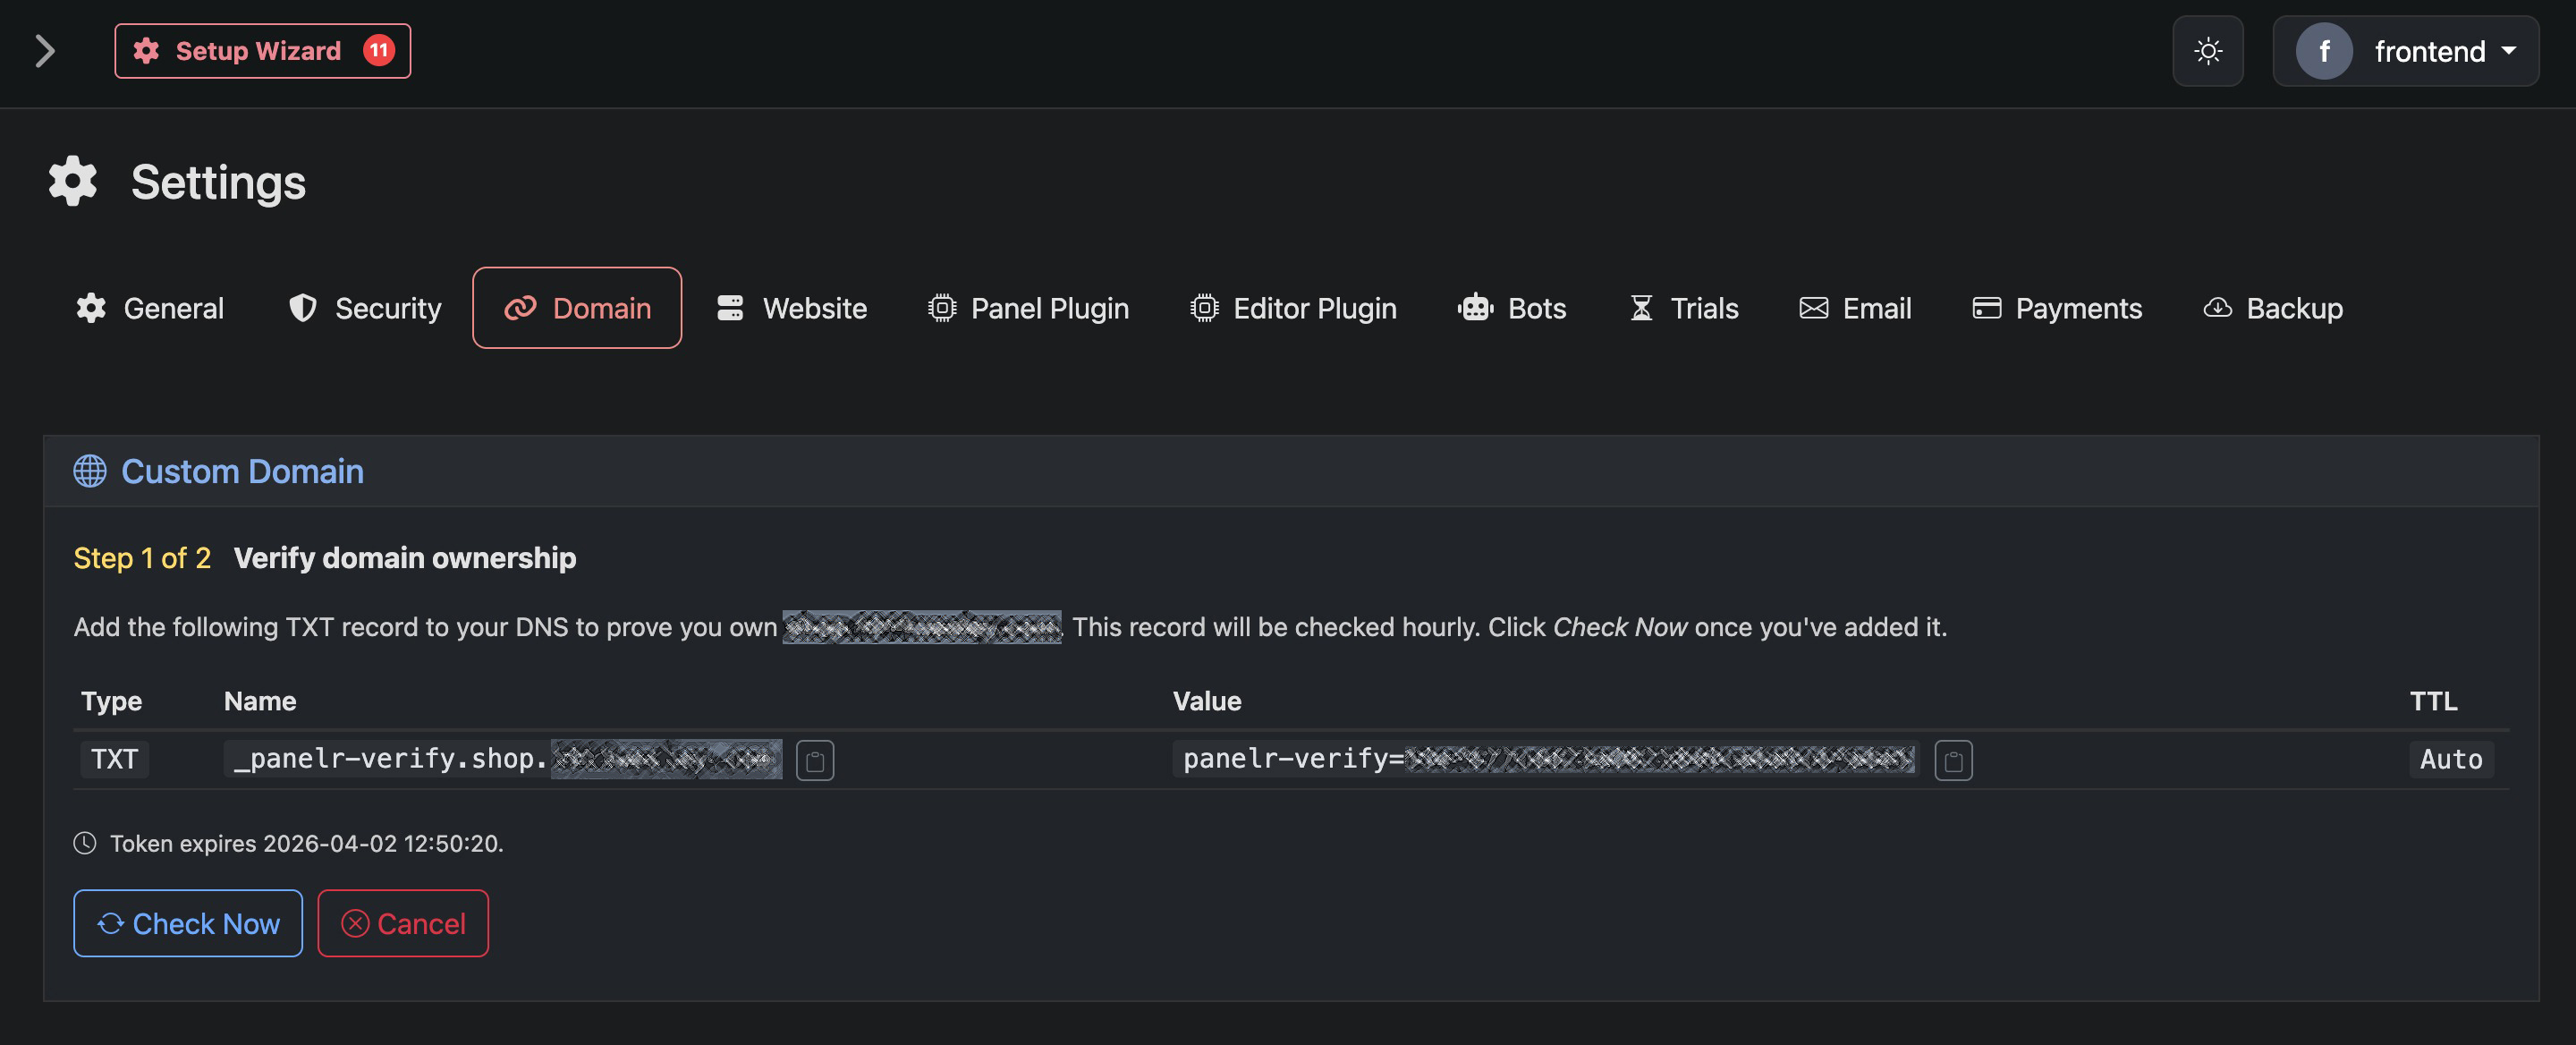
Step 1 of 2 — Verify Domain Ownership
Verify Domain Ownership
To confirm you own the domain, you must add a TXT record to your DNS provider.
You will be given:
Type: TXT
Name: a verification record specific to your domain
Value: a unique verification token
TTL: Auto or default
Add this record exactly as provided. Panelr will check for this record automatically. You can also click “Check Now” after adding it.
The verification token expires after a set period. If it expires before verification completes, you will need to restart the process.
Once the record is detected, ownership will be verified and you can proceed to the next step.
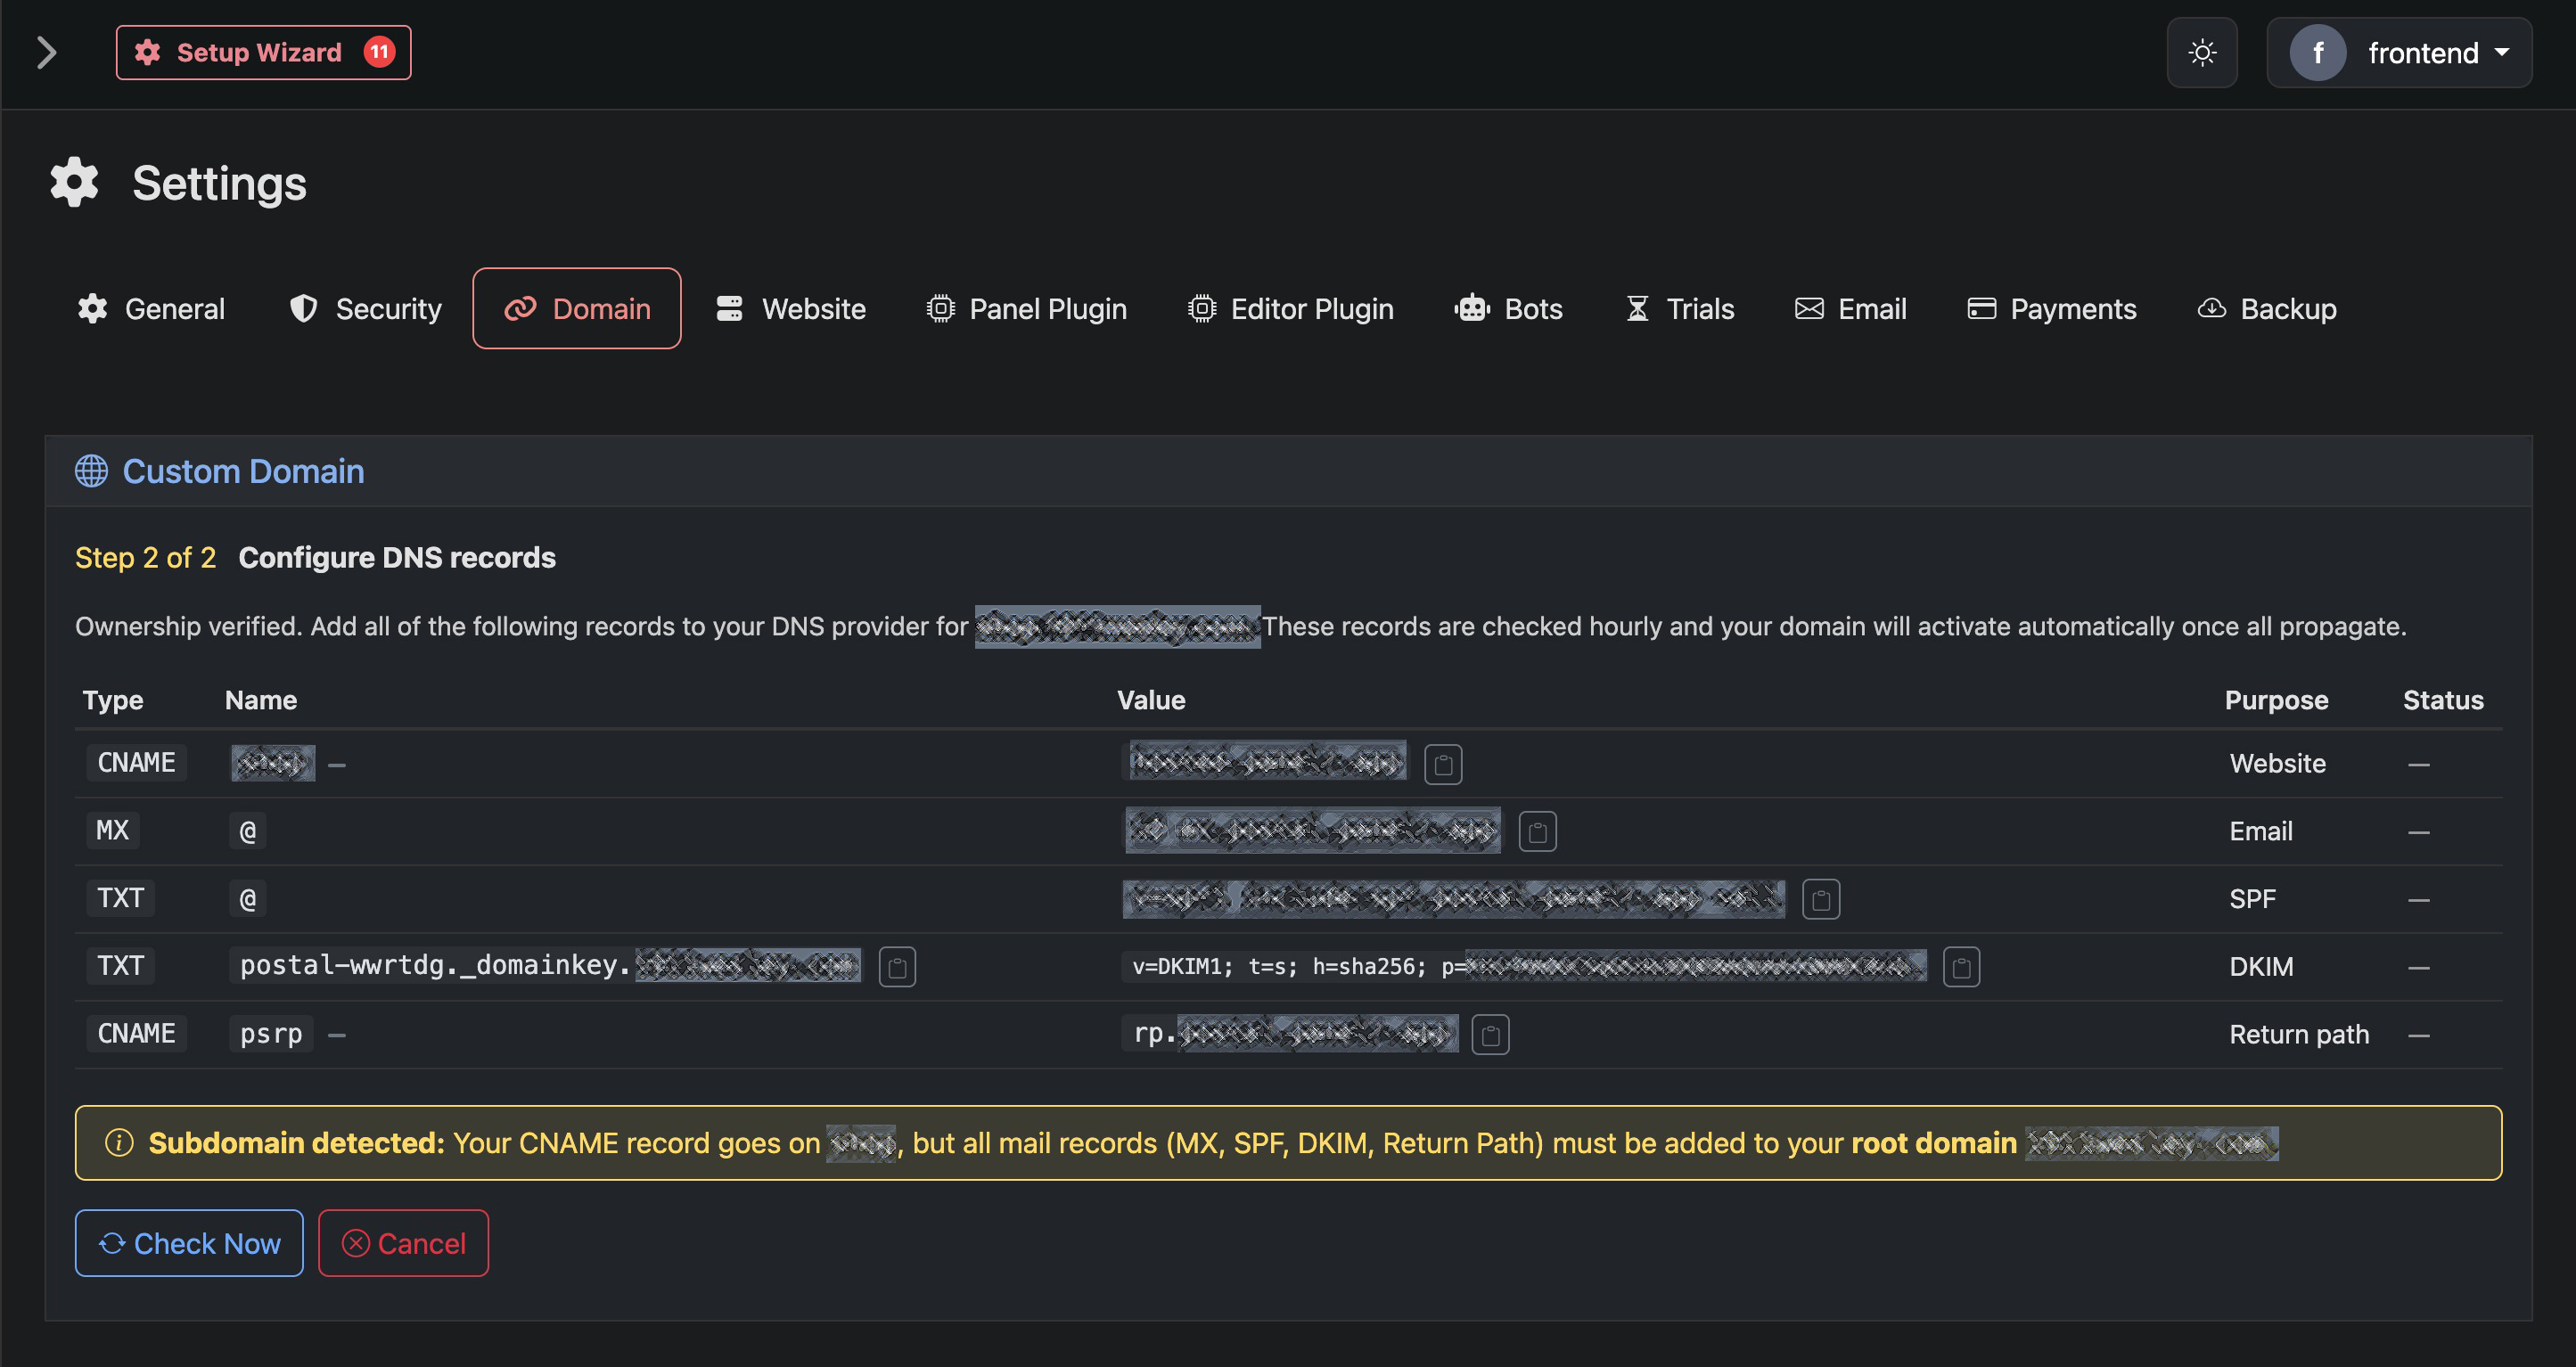
Step 2 of 2 — Configure DNS Records
Configure DNS Records
After verification, you will be given a set of DNS records to complete the setup.
These typically include:
CNAME record
Points your subdomain to Panelr hosting. This connects your website.
MX record
Handles incoming email through Panelr’s mail system.
SPF record (TXT)
Authorizes outgoing mail servers and helps prevent spam classification.
DKIM record (TXT)
Adds a cryptographic signature to your emails to improve deliverability.
Return Path (CNAME)
Handles email bounce and routing behavior.
If you are using a subdomain (for example: store.yourdomain.com), only the CNAME record is added to the subdomain. All email-related records (MX, SPF, DKIM, Return Path) must be added to the root domain (yourdomain.com).
Activation
Once all records are added and have propagated, Panelr will automatically detect them and activate your domain. Behind the scenes, Panelr will: Provision hosting for your domain, Configure SSL, and Set up email delivery services. No additional configuration is required.