Panel Plugin
Settings → Panel Plugin
Use this page to install, activate, and manage the panel plugin used by your Panelr installation. Panel plugins define how Panelr
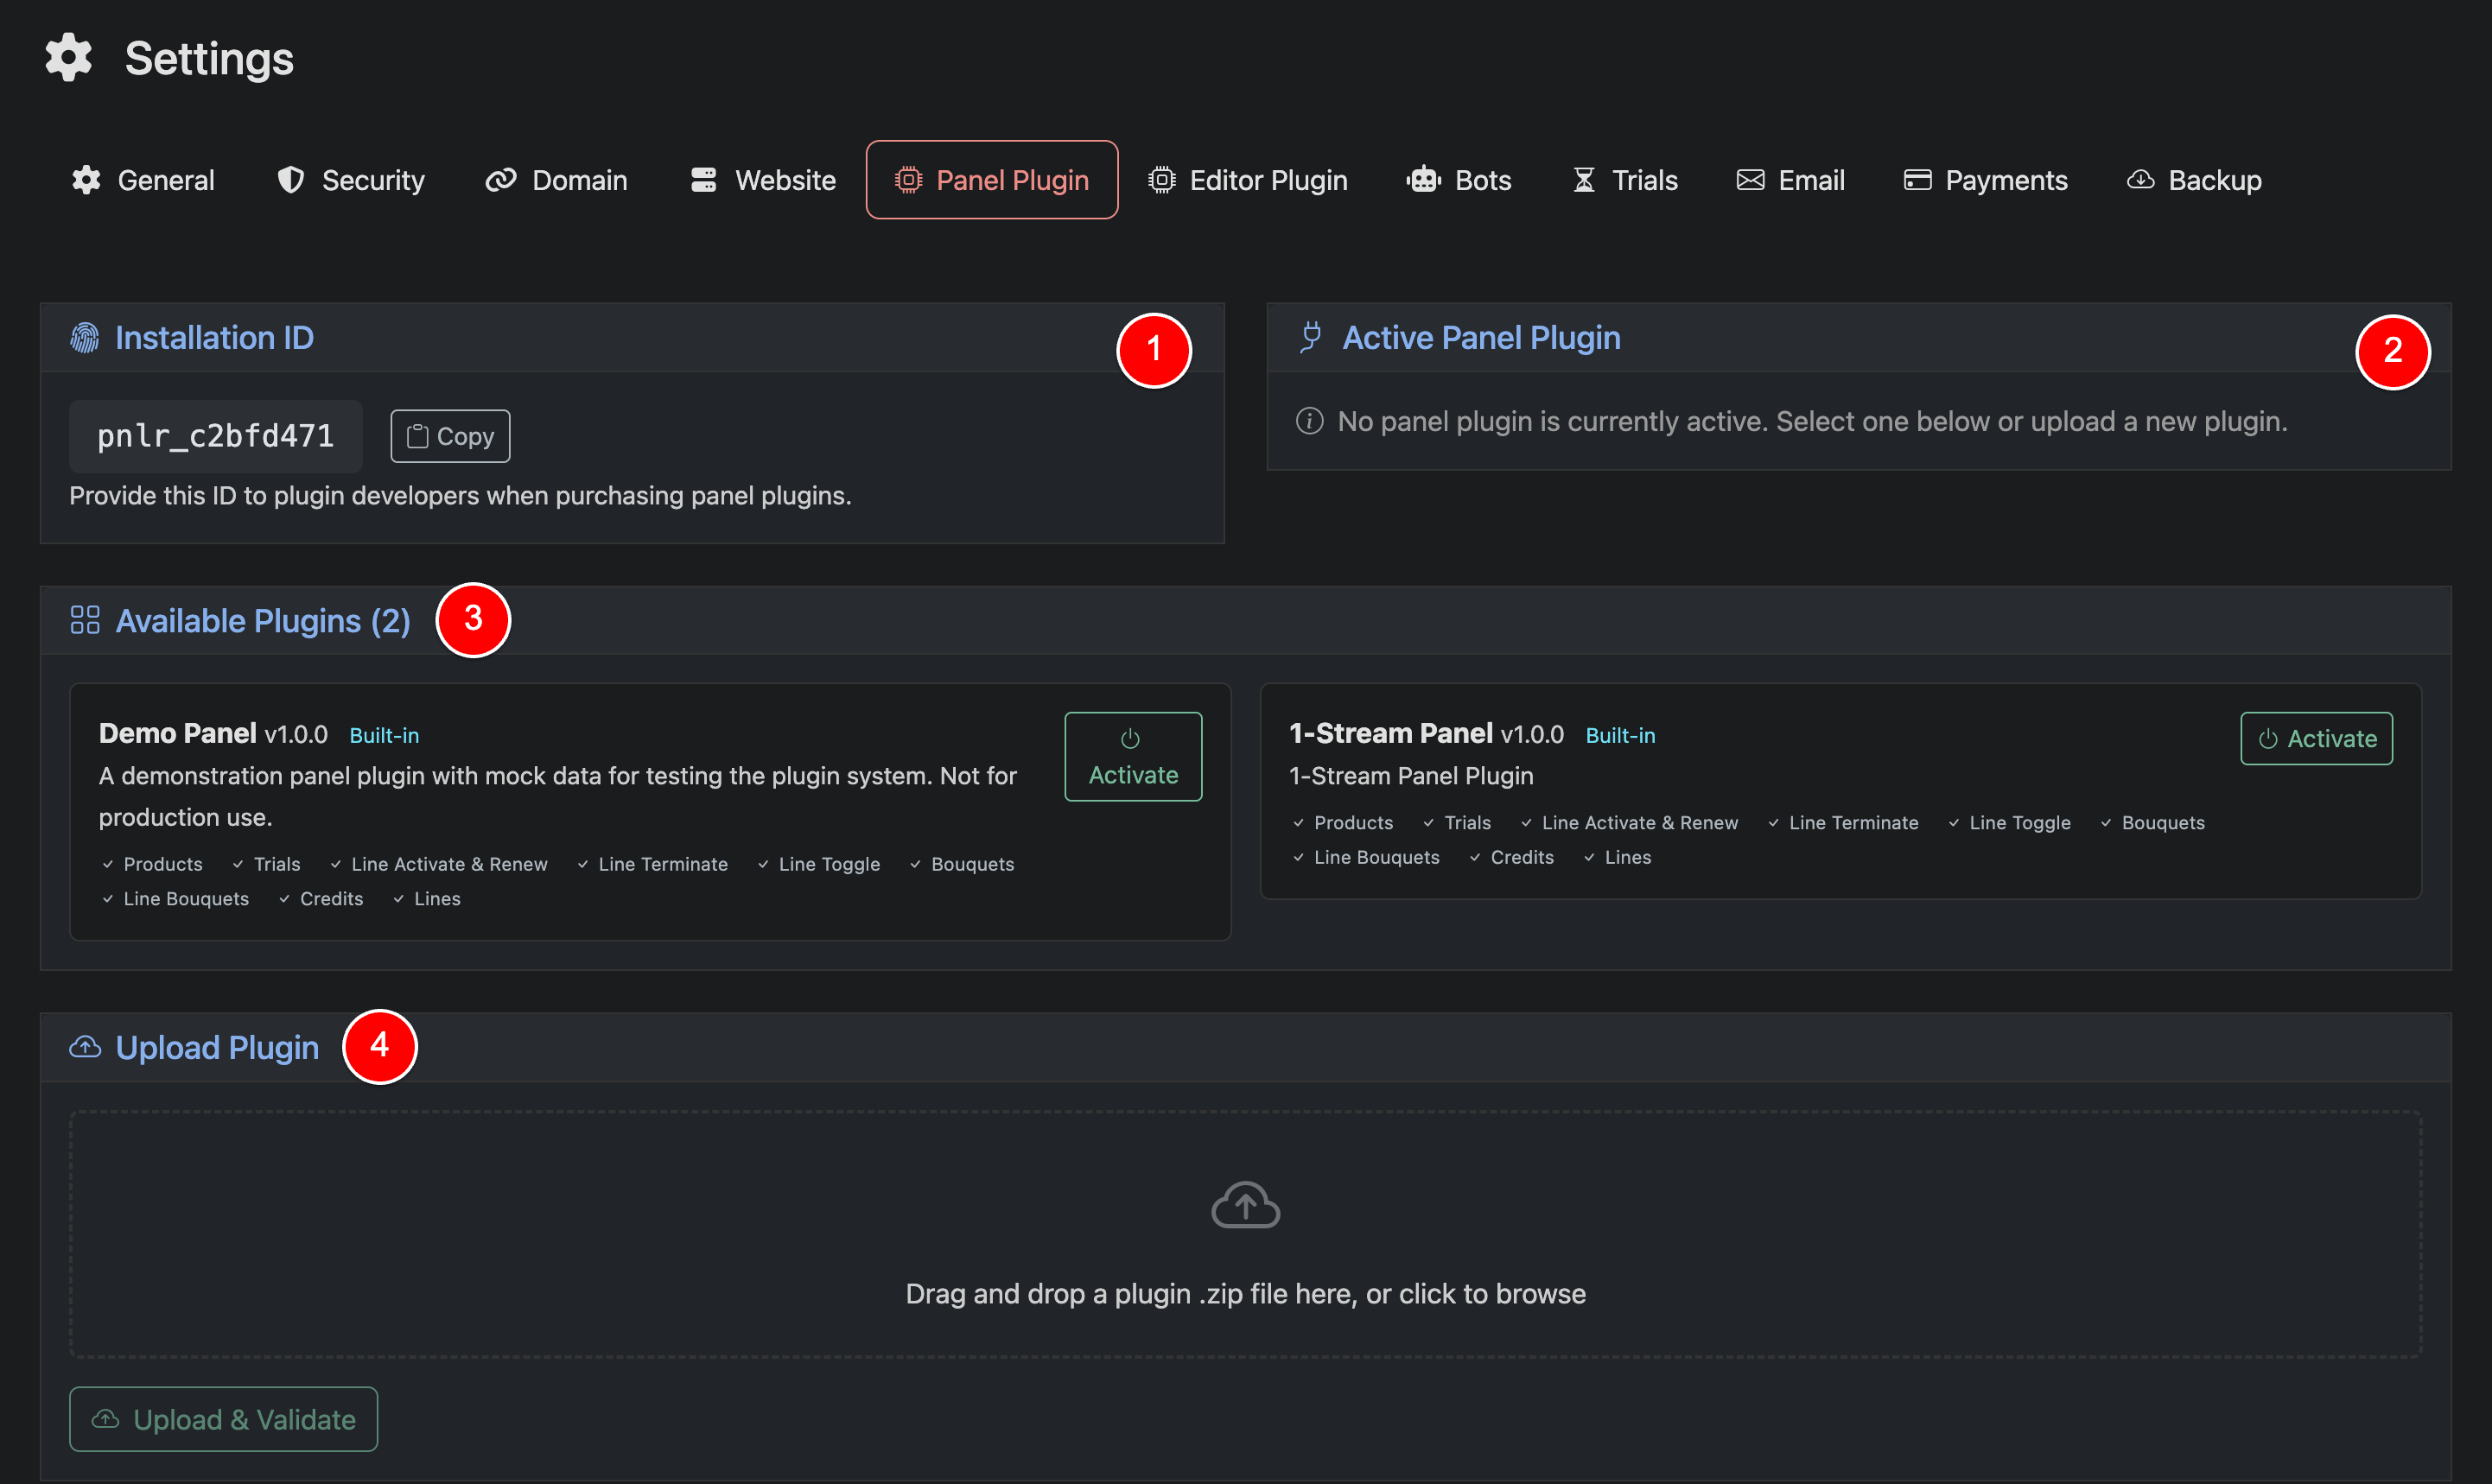
Installation ID (1)
This is your unique Panelr Installation ID. If you are purchasing a custom panel plugin, you must provide this ID to the developer. The plugin is licensed to your installation and will not work without it.
Active Panel Plugin (2)
This section shows the plugin currently active on your installation. If no plugin has been activated yet, Panelr will show that no active panel plugin is selected.
Only one panel plugin can be active at a time.
Available Plugins (3)
This section lists the panel plugins currently available on your installation. Panelr includes two built-in plugins:
- Demo Panel: Demo Panel, which is safe for testing and populates your installation with dummy data.
- 1-Stream Panel, Production plugin which connects Panelr to the 1-Stream panel
Each plugin card shows the plugin name, version, whether it is built in, and the capabilities supported by that plugin. These capabilities depend on what the panel API allows and what the plugin has implemented.
To use a plugin, click Activate.
Activating a new plugin replaces the current panel as the source of truth. Existing panel-synced data may be deleted, reset, or archived as part of the switch.
Upload Plugin (4)
Use this section to upload a custom panel plugin provided by a developer. Plugins must be uploaded as a .zip file and validated before they can be activated.
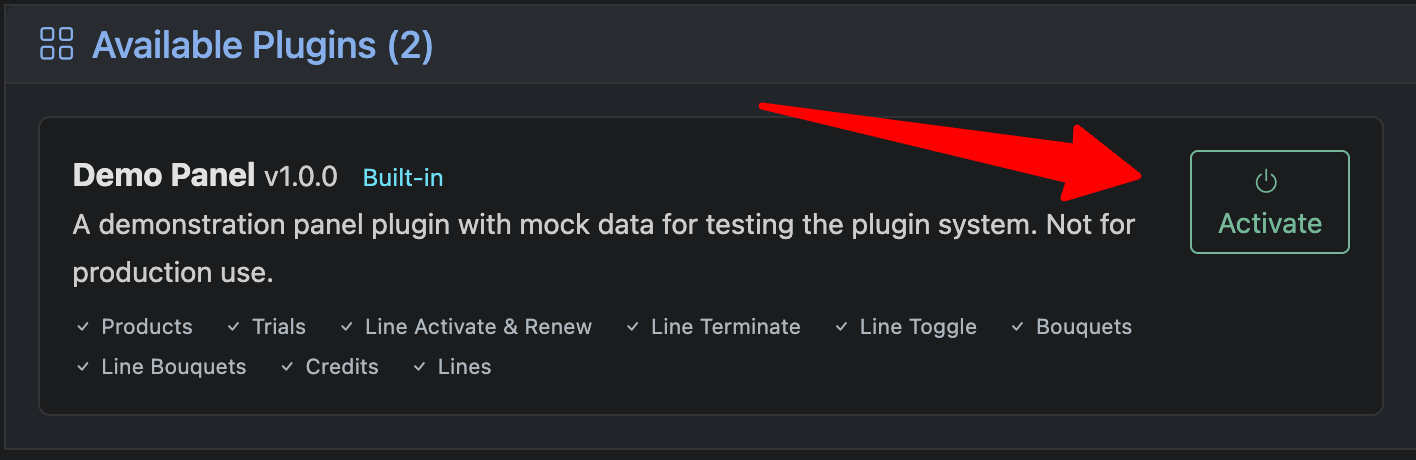
To install the Demo Panel plugin, click Activate on the Demo Panel.
The Demo Panel is a built-in plugin used for testing and learning. It will populate your installation with dummy data so you can explore the system without connecting to a real panel.
Safe to use. Not for production.
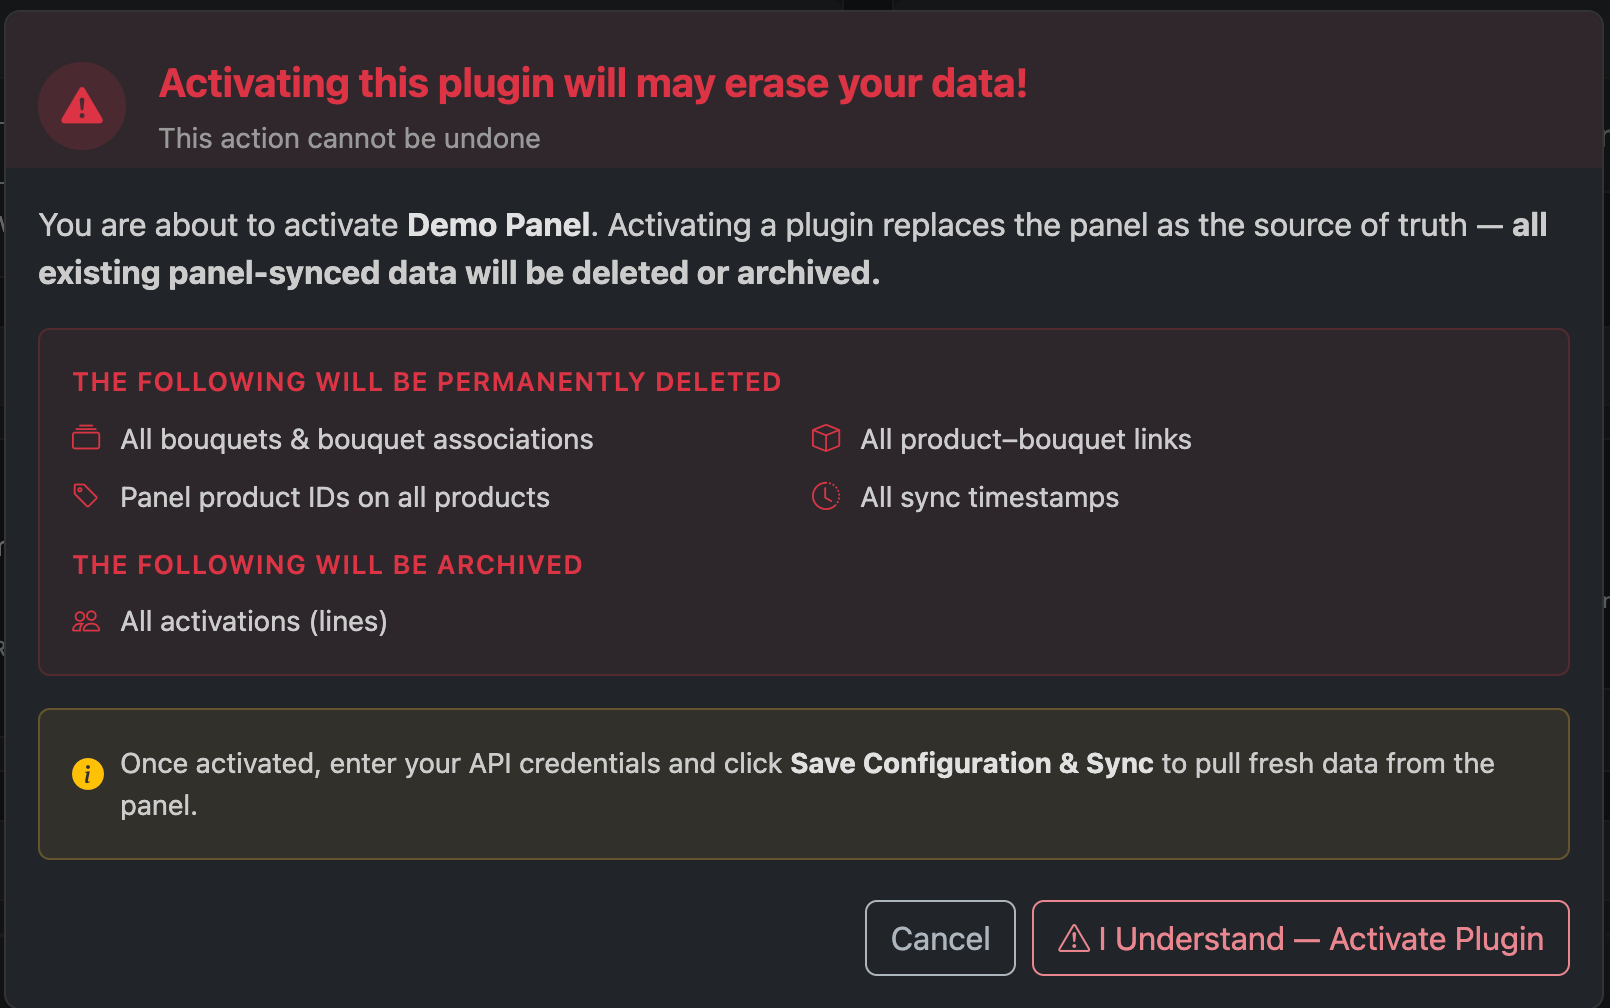
When you click Activate, a confirmation screen will appear.
This warning explains that activating a plugin replaces your current panel connection and resets panel-synced data.
All existing panel-linked data such as products, bouquets, mappings, and sync history will be deleted or reset. Existing activations (lines) will be archived.
This action cannot be undone. To continue, click “I Understand — Activate Plugin”. To cancel, click Cancel.
After activation, you will be prompted to enter your panel API credentials and run a sync to pull fresh data.

After activating the Demo Panel, you will be prompted to configure it.
API Key (1)
Enter any value. The Demo Panel does not require real credentials.
Click Save Configuration once complete. Optionally, click Test Connection to simulate a successful connection.
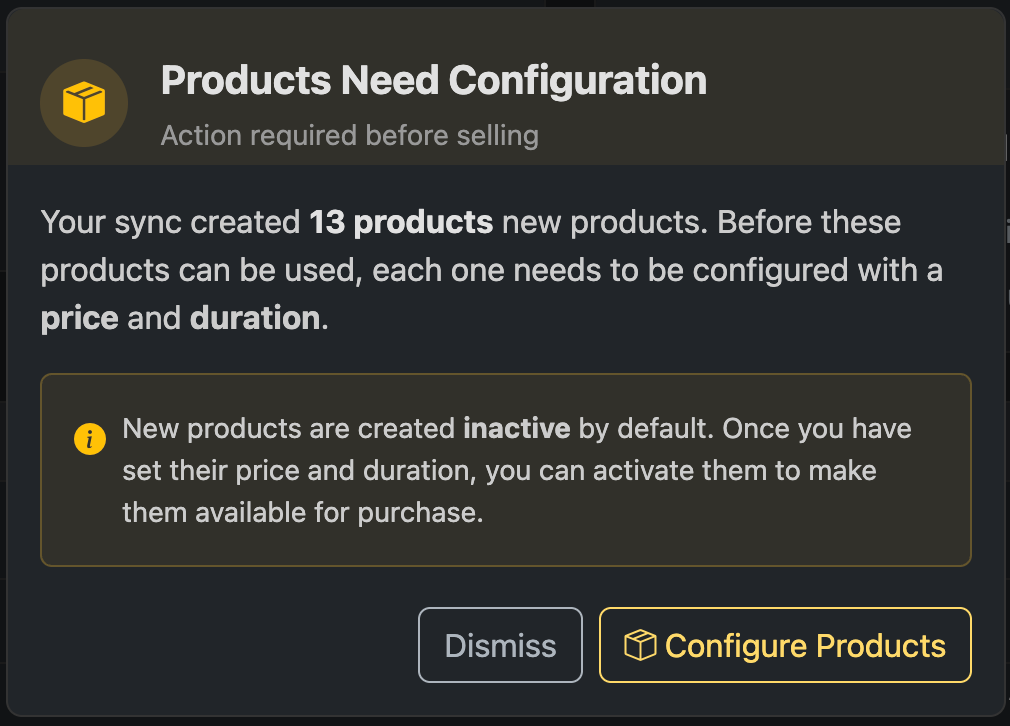
After your first sync completes, Panelr will automatically create products from your panel.
You will be prompted to configure these products before they can be sold.
Each product:
- Has no retail price set
- Is inactive by default until you enable it
You must set a price and duration for each product, then activate them to make them available for purchase. Learn more about configuring products in Products Overview.
After product configuration, you can complete setup from this section.
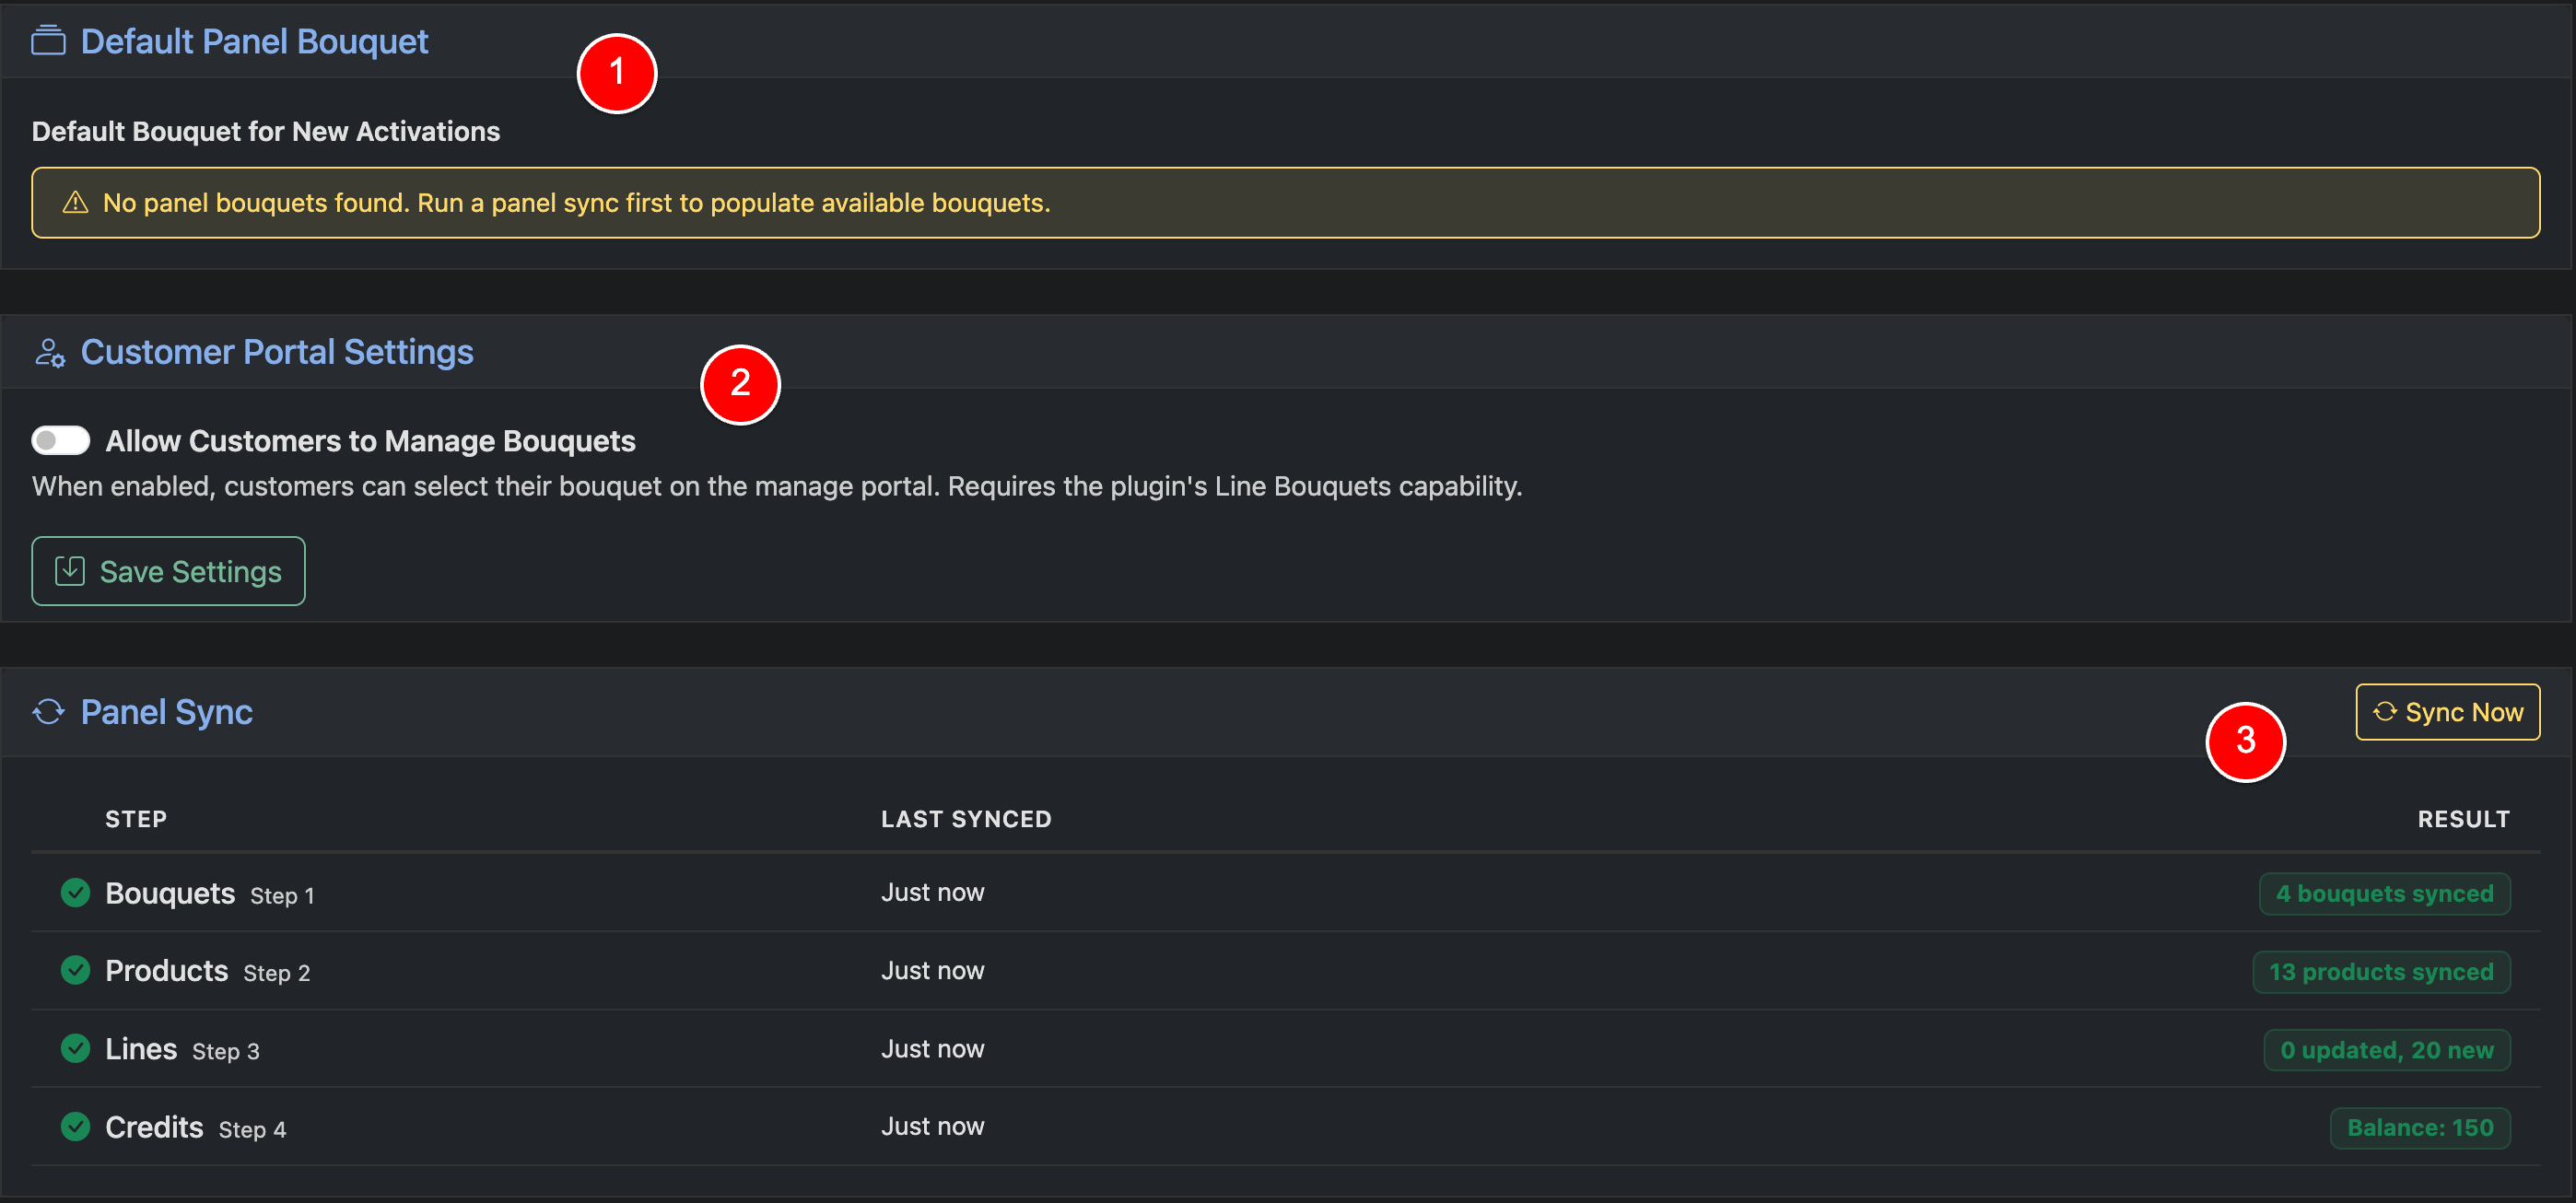
Default Panel Bouquet (1)
If your panel requires a default bouquet for new activations, select it here.
If no bouquets are available, run a panel sync first. Bouquets are pulled from your panel during sync.
Customer Portal Settings (2)
Enable “Allow Customers to Manage Bouquets” if you want customers to select or change their bouquet from the management portal. This requires the plugin to support bouquet management, or to have playlist editor configuration enabled.
Panel Sync (3)
Click “Sync Now” to pull data from your panel.
Data from your panel syncs automatically on a scheduled basis. No manual action is required.